Weddings are a time of joy, celebration, and—let’s be honest—a little bit of stress. Between picking out the perfect dress, the right shoes, and getting your hair just right, it’s easy to overlook one tiny but essential detail: your nails! Whether you’re the bride, a bridesmaid, or a guest, your nails deserve some special attention. After all, they’ll be in countless photos, holding bouquets, and raising toasts. Today, I’m excited to share some easy nail art designs that are perfect for weddings and trust me, I’ve tried them all!
1. Classic French Manicure with a Twist
Let’s start with a timeless favorite that never fails—the French manicure. But wait, before you roll your eyes and think, “I’ve seen this a million times,” let me introduce you to a modern twist that takes this classic to a whole new level.
Instead of the traditional white tips, I recommend using soft gold or rose gold. It adds a touch of elegance and warmth, perfect for a wedding. I used this design for my cousin’s wedding, and it was a hit! The subtle sparkle of gold caught the light beautifully, making my nails look both sophisticated and glamorous.
How to achieve this look:
- Start with a clear or nude base coat.
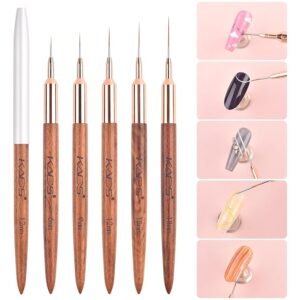
- Use a thin nail brush to apply the gold polish to the tips of your nails.
- Finish with a high-shine top coat to seal in the color and add gloss.
Trust me, this look is easy to do at home and adds just the right amount of flair without overpowering your overall look.

2. Delicate Floral Designs
Nothing says “wedding” like flowers, and incorporating floral designs into your nail art is a beautiful way to celebrate the occasion. I’m a huge fan of this look, especially for spring and summer weddings.
For my best friend’s outdoor wedding, I opted for a delicate floral design. I used soft pastel colors—think blush pink, lavender, and mint green—on a nude base. I kept the flowers small and understated, which added a touch of romance without being too over-the-top.
How to achieve this look:
- Start with a nude or pale pink base coat.
- Use a dotting tool to create tiny flowers in soft pastel shades. I recommend starting with a small dot in the center and then adding petals around it.
- Add some tiny green leaves to complete the design.
- Finish with a top coat to protect your artwork.
This design is perfect if you’re going for a romantic, whimsical vibe. Plus, it’s easier to create than it looks!

3. Glitter Gradient
If you’re like me and believe that a little sparkle makes everything better, then you’ll love the glitter gradient design. It’s simple yet stunning, and it works for any wedding theme, whether it’s a grand ballroom affair or a laid-back beach celebration.
For my wedding (yes, I’ve been there!), I wanted something that would catch the light and add a bit of glam without being too bold. A glitter gradient was the perfect choice. I started with a nude base and added a gradient of silver glitter from the tips down towards the middle of the nails. The result was a subtle yet eye-catching effect that looked incredible in photos.
How to achieve this look:
- Apply a nude or light pink base coat.
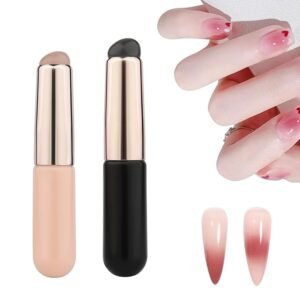
- Use a makeup sponge to dab silver glitter polish onto the tips of your nails, gradually fading the glitter down towards the middle.
- Repeat the process until you achieve the desired intensity.
- Seal with a top coat to smooth out the glitter and add shine.
This design is especially great for brides or anyone who wants their nails to have a little extra sparkle on the big day.

4. Lace-Inspired Nails
Lace is such a beautiful and feminine detail, and it translates perfectly into nail art. I’ve always loved the look of lace, so I decided to give lace-inspired nails a try for a wedding I attended last year. The result? Stunningly elegant nails that everyone complimented!
For this look, I used a sheer white polish over a nude base to create a lace effect. You can use a stamping kit to achieve the lace design, or if you’re feeling creative, you can hand-paint the pattern using a thin nail brush.
How to achieve this look:
- Start with a nude or pale pink base coat.
- Apply a sheer white polish over the entire nail.
- Use a lace-patterned nail stamp or hand-paint a lace design using a thin brush and white polish.
- Finish with a top coat to add shine and protect the design.
Lace nails are perfect for a bride or bridesmaid looking for something that’s both delicate and sophisticated.

5. Pearl Accents
Pearls are a classic wedding accessory, so why not incorporate them into your nail art? I recently tried this look for a friend’s wedding, and I was so pleased with how it turned out. The pearls added a touch of elegance and sophistication, and they looked amazing against my soft pink nails.
How to achieve this look:
- Start with a soft pink or nude base coat.
- While the polish is still tacky, use a pair of tweezers to place small pearl accents onto your nails. You can place them at the base of the nail, along the tips, or in a random pattern.
- Press down gently to secure the pearls.
- Finish with a top coat to seal the pearls in place.
This design is ideal for brides who want something classic yet unique. The pearls add a touch of luxury that’s perfect for a wedding day.

6. Simple Metallic Stripes
Metallics are always in style, and they’re a great way to add some shine to your wedding nails without going overboard. I tried this design for a winter wedding, and I loved how it added a modern touch to my overall look.
For this design, I used a silver metallic polish to create simple stripes on a pale pink base. The result was chic and understated, but still special enough for a wedding.
How to achieve this look:
- Apply a pale pink or nude base coat.
- Use nail striping tape to create straight lines across your nails.
- Apply a silver metallic polish over the tape.
- Remove the tape while the polish is still wet to reveal clean, crisp lines.
- Finish with a top coat to add shine and protect the design.
This design is perfect for someone who loves a modern, minimalist look with a touch of elegance.

7. Ombre Nails
Ombre nails are a fantastic option for weddings because they’re versatile and can be customized to match any color scheme. I used an ombre design for a summer wedding I attended, and it was such a fun and fresh look!
For my nails, I chose a gradient that went from light pink to white. The soft transition between colors was subtle yet stunning, and it matched my dress perfectly.
How to achieve this look:
- Apply a light pink base coat.
- Use a makeup sponge to dab white polish onto the tips of your nails, blending it into the pink.
- Repeat the process until you achieve a smooth gradient.
- Finish with a top coat to add shine and blend the colors even more.
Ombre nails are a great choice for bridesmaids or guests who want a chic and modern look that’s still wedding-appropriate.

Final Thoughts
Nail art is such a fun and creative way to express your style, especially at a wedding. Whether you’re the bride, a bridesmaid, or a guest, there’s a nail design out there that’s perfect for you. From classic French tips with a twist to glitter gradients and lace-inspired designs, the options are endless.
I hope these ideas inspire you to try something new for your next wedding event. Remember, the most important thing is to choose a design that makes you feel confident and beautiful. After all, your nails are the finishing touch to your overall look, and they deserve to be just as stunning as the rest of you!
Happy painting, and may your nails be the talk of the wedding!
