
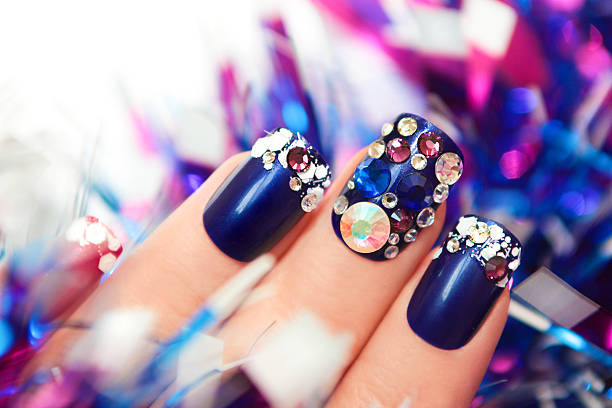
Ever looked up at the night sky and felt mesmerized by the twinkling stars and the infinite depth of the galaxy? Well, now you can bring that celestial beauty right to your fingertips with galaxy nail art! This dreamy design is not only stunning but surprisingly easy to create at home. In this guide, I’ll walk you through the process step by step, sharing my tips and tricks along the way. Trust me, once you try this out, you’ll be showing off your nails to everyone!
What You’ll Need
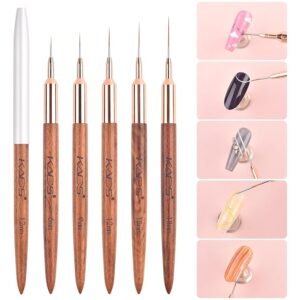
Before we dive into the fun part, let’s make sure you’ve got all the essentials. Here’s a list of everything I used when I created my Galaxy nail art:
- Base Coat: To protect your natural nails.
- Black Nail Polish: This will be the backdrop for your galaxy.
- Sponge: For blending colors.
- Metallic or Shimmery Nail Polishes: Think blues, purples, pinks, and whites.
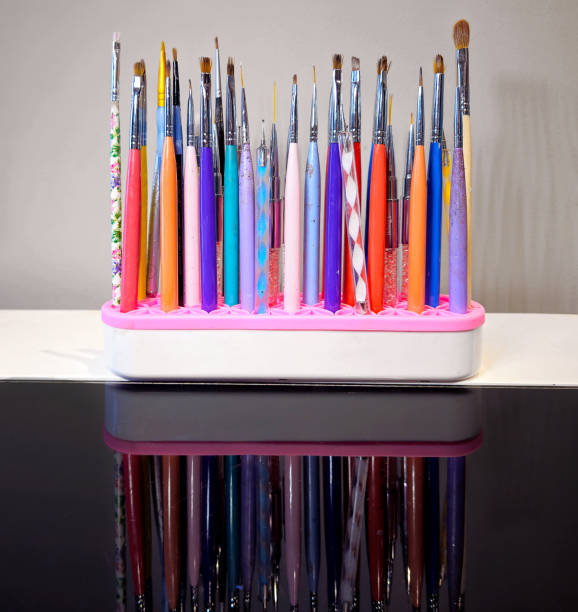
- Toothpick or Nail Art Brush: For detailing stars and other small accents.
- Top Coat: To seal and protect your design.
- Glitter Nail Polish (Optional): For that extra sparkle!
I remember the first time I tried this, I was a bit skeptical about how it would turn out, but with these materials, the results were nothing short of magical.
Step-by-Step Guide to Galaxy Nails
Step 1: Prep Your Nails
First things first, prep your nails by filing them to your desired shape and buffing the surface lightly. I always like to push back my cuticles too—this gives a cleaner look once the design is done. Apply a base coat to protect your nails and ensure that the polish adheres better.
Step 2: Apply the Black Base
Next, apply two coats of black nail polish. This will serve as the night sky backdrop for your galaxy. Make sure each coat dries completely before applying the next one. I used a quick-drying black polish, which saved me some waiting time.
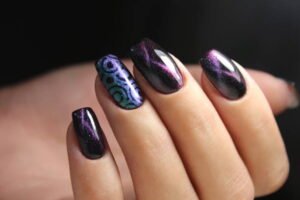
Step 3: Create the Galaxy with a Sponge
Here’s where the real magic happens. Take your sponge and dab a bit of blue nail polish on it. Lightly sponge the blue onto random areas of your nails—this doesn’t have to be perfect. Remember, galaxies are naturally chaotic and random!
Once the glue is dry, repeat the process with purple and pink nail polishes, sponging each color over the blue but leaving some black space visible. I found that blending the colors slightly where they overlap creates a more natural, nebula-like effect.
Step 4: Add Stars and Sparkle
Now that you’ve got your galaxy backdrop, it’s time to add some stars! Dip a toothpick or a nail art brush into white nail polish and dot tiny stars all over your nails. You can also draw a few larger stars by creating small cross shapes.
For that extra cosmic touch, I applied a thin layer of glitter nail polish over the entire design. The glitter adds dimension and makes your galaxy nails truly pop!
Step 5: Seal with a Top Coat
Finally, once your design is dry, seal it with a top coat. This not only gives your nails a glossy finish but also protects your art from chipping. I recommend using a high-shine top coat for that polished, professional look. I’ve noticed that a good top coat can make your galaxy nails last much longer, keeping that celestial beauty intact.
Tips and Tricks for Perfect Galaxy Nails
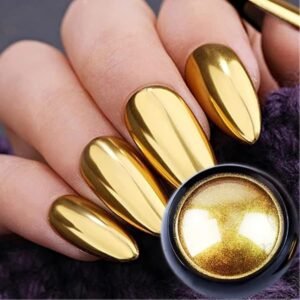
- Experiment with Colors: Don’t be afraid to mix up the colors. I’ve tried this design with teal, silver, and even gold accents, and the results were fantastic! The key is to blend the colors seamlessly to mimic the swirling gases in a real galaxy.
- Use a Makeup Sponge: If you find that your regular sponge is too dense, try using a makeup sponge instead. It’s softer and can create a more subtle, diffused effect. I switched to a makeup sponge after my first attempt and found it much easier to work with.
- Practice on Paper First: If you’re nervous about messing up, practice the sponging technique on a piece of paper before applying it to your nails. This helped me get a feel for the technique and gave me the confidence to go all-in on my nails.
- Customize Your Stars: You can create different sizes of stars by varying the pressure of your toothpick or using different tools. I love mixing tiny dots with a few bold starbursts to add depth to the design.
Why I Love Galaxy Nail Art
There’s something so captivating about galaxy nail art. Maybe it’s the way it captures the mystery and beauty of the cosmos, or maybe it’s just how unique and customizable it is. No two galaxy nail designs are ever the same, which makes this art form feel special every time you create it.
I’ve received so many compliments on my Galaxy nails, and it’s always fun to tell people that I did them myself. Plus, there’s a sense of satisfaction in looking down at your nails and seeing a mini-universe at your fingertips. It’s like carrying a piece of the night sky with you wherever you go.
Final Thoughts
If you’re looking for a nail art design that’s both stunning and fun to create, galaxy nails are the way to go. The best part is that it’s nearly impossible to mess up—each nail can be its little world, and any imperfections only add to the charm.
So grab your polishes, unleash your inner artist, and get ready to create some out-of-this-world nails. Trust me, once you see the final result, you’ll be hooked on Galaxy nail art just like I am. Whether it’s for a special occasion or just because this design is sure to leave you feeling starry-eyed.
Happy nail painting!


")