
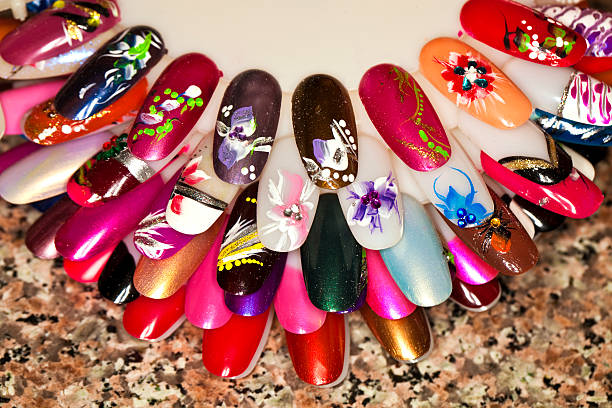
As the cold days of winter fade away, it’s time to shake off the gloom and embrace the vibrant energy of spring and summer. Just like we swap our winter coats for breezy dresses, our nails deserve a fresh, fun update too. Nail art is a perfect way to celebrate the warmer seasons, adding a pop of color and creativity to your look. Whether you’re heading to a summer festival, a beach day, or just enjoying the sunshine in your backyard, your nails can be a stunning accessory. Let me share some of my favorite nail art ideas for spring and summer—designs I’ve personally tried, loved, and can’t wait to recommend to you.
Floral Fantasies
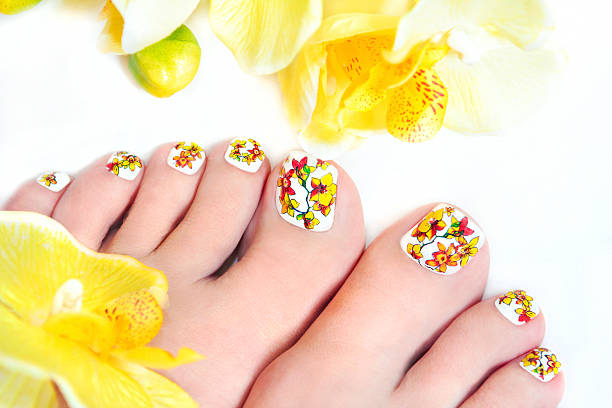
Spring is all about the flowers, right? So why not bring the garden to your fingertips? Floral nail art is classic, versatile, and oh-so-pretty. I recently tried a delicate daisy design, and let me tell you, it was an instant mood booster. I used a soft pastel pink as the base, which was perfect for that gentle spring vibe. On top of that, I painted tiny white daisies with yellow centers—super cute and feminine!
How to Create This Look:
- Start with a light pastel base coat—think soft pink, lavender, or baby blue.
- Once the base is dry, use a fine nail art brush or a dotting tool to create small flower petals. White is a go-to color, but you can mix it up with other shades.
- Add a dot of yellow or another contrasting color in the center of each flower.
- Finish with a clear top coat to seal in your design and add a glossy shine.
Floral designs are great because they can be as simple or intricate as you like. If you’re feeling adventurous, try combining different flowers or adding some green leaves for a more elaborate garden scene.
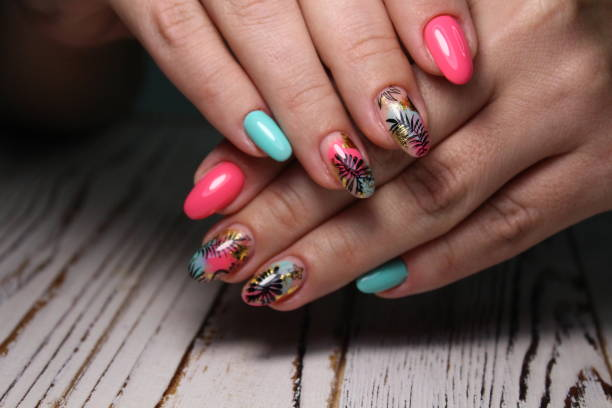
Tropical Vibes
When summer rolls around, I’m all about the tropical vibes. There’s something about palm trees and pineapples that just screams summer fun. Last year, I went for a bright yellow base with little green palm trees on my ring fingers, and it was a hit at every summer party I attended. It’s a design that brings a smile to your face every time you look at your nails.
How to Create This Look:
- Start with a bright and bold base color—yellow, turquoise, or coral works great.
- For the palm trees, use a dark green polish and a thin brush to draw the trunk and leaves. Don’t worry if it’s not perfect—palm trees are naturally a bit wild!
- Pineapples are a bit trickier but so worth it. Paint an oval shape in yellow, add some brown crisscross lines for texture, and top it off with green leaves.
- Add a top coat to protect your design and give it a long-lasting finish.
This design is perfect for beach vacations or just when you want to feel like you’re on one. Plus, it’s a fun conversation starter—people will ask where you got your nails done!
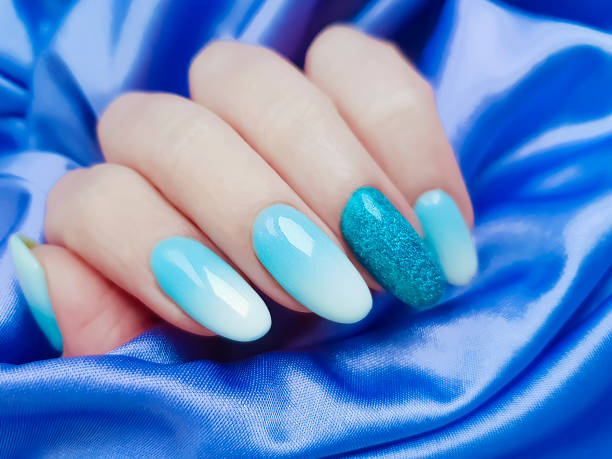
Ombre Magic
There’s something so mesmerizing about a summer sunset—the way the colors blend from one to another is pure magic. Why not capture that on your nails with an ombre design? I tried this look with a gradient from coral to pink, and it was like carrying a little piece of sunset with me everywhere I went.
How to Create This Look:
- Choose two or three colors that blend well together. For a sunset effect, try coral, orange, and pink.
- Apply the lightest color as your base coat and let it dry completely.
- Use a makeup sponge to dab on the second color, starting from the tip and working your way down the nail. Blend as you go to create a seamless transition.
- Repeat with the third color if you’re using one, starting a bit higher up than the second color.
- Clean up any excess polish around your nails and finish with a top coat.
The ombre effect is so versatile—you can play with different color combinations to match your mood or outfit. It’s a bit more time-consuming than other designs, but the results are so worth it.
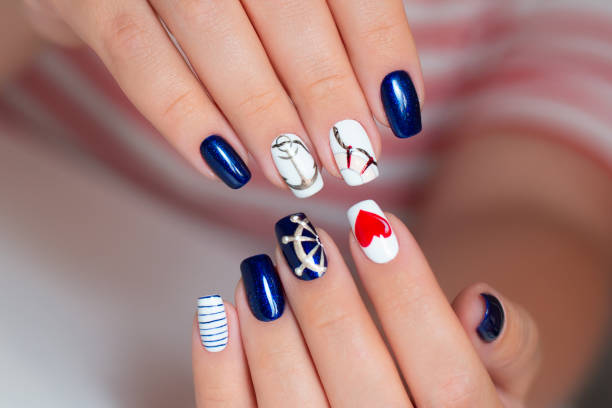
Nautical Stripes
Nautical themes are a summer staple, and they look just as good on your nails as they do on your outfit. I’m a big fan of the classic navy and white stripe combo—it’s clean, chic, and always in style. I recently added a little gold anchor on my thumb for a fun twist, and it gave my nails that extra bit of summer flair.
How to Create This Look:
- Start with a white base coat and let it dry completely.
- Use striping tape to create evenly spaced lines on your nails.
- Paint over the tape with navy blue polish, then carefully remove the tape while the polish is still wet.
- For an extra touch, use a gold nail polish or nail art sticker to add an anchor, star, or other nautical symbols.
- Seal everything with a top coat for a polished finish.
Nautical nails are perfect for a day on the boat or just when you want to feel a bit closer to the sea. It’s a timeless design that always looks fresh.
Fruity Fun
Nothing says summer quite like fresh fruit, and incorporating these delicious treats into your nail art is a fun and playful way to celebrate the season. I’ve tried a few different fruit designs over the years, but my favorite has to be watermelon nails. The combination of green, pink, and black is so bright and cheerful—it’s like carrying a little slice of summer with you.
How to Create This Look:
- Start with a bright pink or red base color.
- Paint the tips of your nails with a green polish to represent the watermelon rind.
- Use a dotting tool to add small black seeds across the pink portion.
- Add a clear top coat to protect your design and give it a glossy finish.
Other fruits like strawberries, pineapples, or lemons work great too. You can even mix and match different fruits on each nail for a fruity salad look. It’s a fun, fresh design that’s perfect for picnics, BBQs, or just enjoying the sunshine.
Bold and Bright Geometrics
If you’re someone who loves a bit of edge in your style, geometric nail art is the way to go. I recently experimented with bold, bright colors in a geometric pattern, and I loved how modern and chic it looked. I went for a mix of triangles and lines in neon shades, and it was a total showstopper.
How to Create This Look:
- Choose a few bright, contrasting colors—neons work great for summer.
- Start with a solid base color on each nail.
- Use striping tape or a thin brush to create geometric shapes on your nails—think triangles, squares, or abstract lines.
- Fill in the shapes with your chosen colors, alternating for a fun mix-and-match effect.
- Seal with a top coat to smooth out any edges and add shine.
This design is perfect for those who love to make a statement with their nails. It’s bold, trendy, and sure to turn heads wherever you go.
Glitter Glam
Who doesn’t love a bit of sparkle? Glitter nail art is always a good idea, especially in the summer when the sun can catch those sparkles and make them shine even brighter. I love adding a glitter accent nail to a more muted design, like a pastel or nude polish, for just a hint of glam.
How to Create This Look:
- Start with your chosen base color—nudes, pastels, or even a solid black work well.
- Once the base is dry, apply a glitter polish to one or two accent nails.
- For extra sparkle, you can layer different sizes of glitter or even add some rhinestones.
- Finish with a clear top coat to lock in the glitter and add extra shine.
Glitter nails are perfect for special occasions or just when you want to add a little extra sparkle to your day. They’re also surprisingly versatile—glitter can be subtle or bold, depending on how you apply it.
Final Thoughts
Whether you prefer soft pastels, bold neons, or something in between, there’s a nail art design out there that’s perfect for your spring and summer style. I’ve personally tried and loved each of these designs, and I’m excited for you to give them a go. Remember, nail art is all about expressing yourself, so don’t be afraid to experiment with colors, patterns, and designs that make you feel good.
So, grab your favorite polishes, put on some summer tunes, and get creative with your nails. Trust me, every time you look down at your hands, you’ll feel that little extra burst of joy that only a fresh, fun manicure can bring.
Happy painting!


")